Bachelorette Party Fun
My cousin is getting married in a couple of days, but we held her bachelorette party early per her request. There was of course body part themed cake, cookies, cake pops as well as some other items, but since this is a family blog I will try to keep it as clean as possible. First up we decided that since it was just a small group of us at the bachelorette party we would go out to dinner then go back to one of the bridesmaids houses to finish celebrating. My favorite thing that we decided to do was matching shirts for all of the "party" goers. I have a thing for tie dye so of course we had to do that. My cousin isn't real big on any super bright colors and mostly likes earthy tones so we went with blues and greens. Here is how I made these nifty Tie-Dye shirts.

 First you take a white shirt and draw the shape that you want on it. In this case I did hearts because it seemed appropriate. I used a washable marker so that it would come out when I washed it. Next use some dental floss to sew around the outline and pull it tight.
Once this is done you will rubber band around the colored line, make sure to do so tightly and for a more defined shape use a thicker rubber band. Then Go to town with any kind of tie dye technique you choose. One of the other bridesmaids graciously helped me with the dying since I was also trying to supervise the munchkins who were dying shirts of their own.
After I finished the shirts I decided with as hot as it has been that tank tops might be better than T-shirts so I cut them up.

The sleeves and collar get cut off first

Next you flip the top over once and hem to form a pocket. I made mine about 3/4"

Cut off the cuffs of the sleeves and thread through the pockets. I've found using a safety pin to help drag it through helps a LOT.

Take the straps on each side and sew them together.

You will get something like this
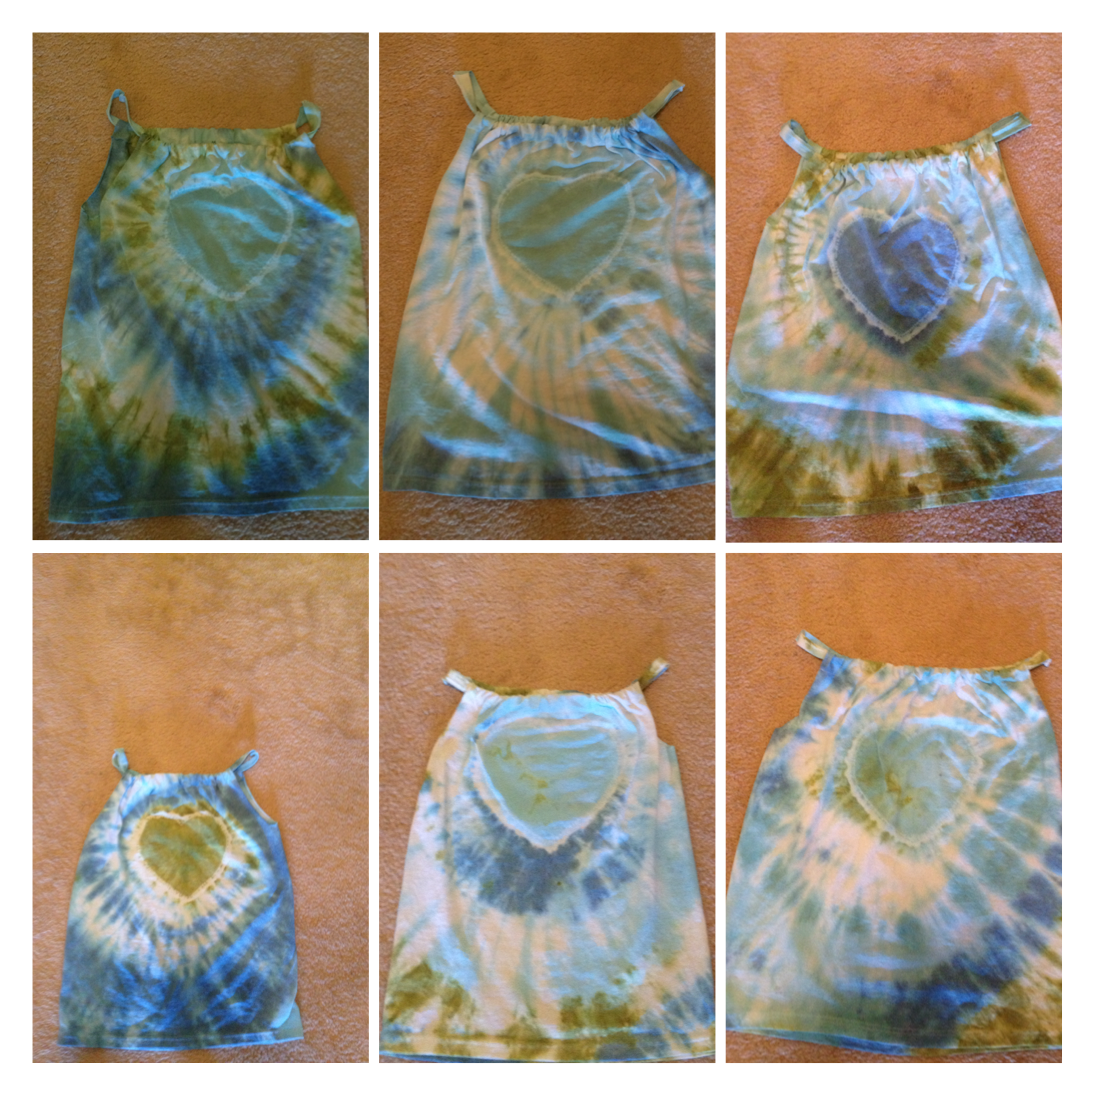
Here are the six shirts for the partygoers

I "specialized" the Bride's a little bit using a stenciling technique

I turned the remainder of the sleeves into matching headbands for the shirts.

I put each shirt and headband into a canning jar with each person's initial etched into the glass. I also sealed the jars with a scrap of the shirt and a washer on elastic with each guest's name stamped on it. We used the jars for water at the party and the elastic and washers made GREAT tags for the other glasses so that nobody's drinks got mixed up.

Here is the bride to be sporting her custom tie-dye top and the lovely glittery tutu that one of the other bridesmaids made for the occasion.
No comments:
Post a Comment